StitchGenerator
StitchGenerator is a script for 3ds max that creates stitch objects and an object to illustrate the hole between stitches on selected edges, along a spline or simply by painting them. See the YouTube video for a quick overview of the features.
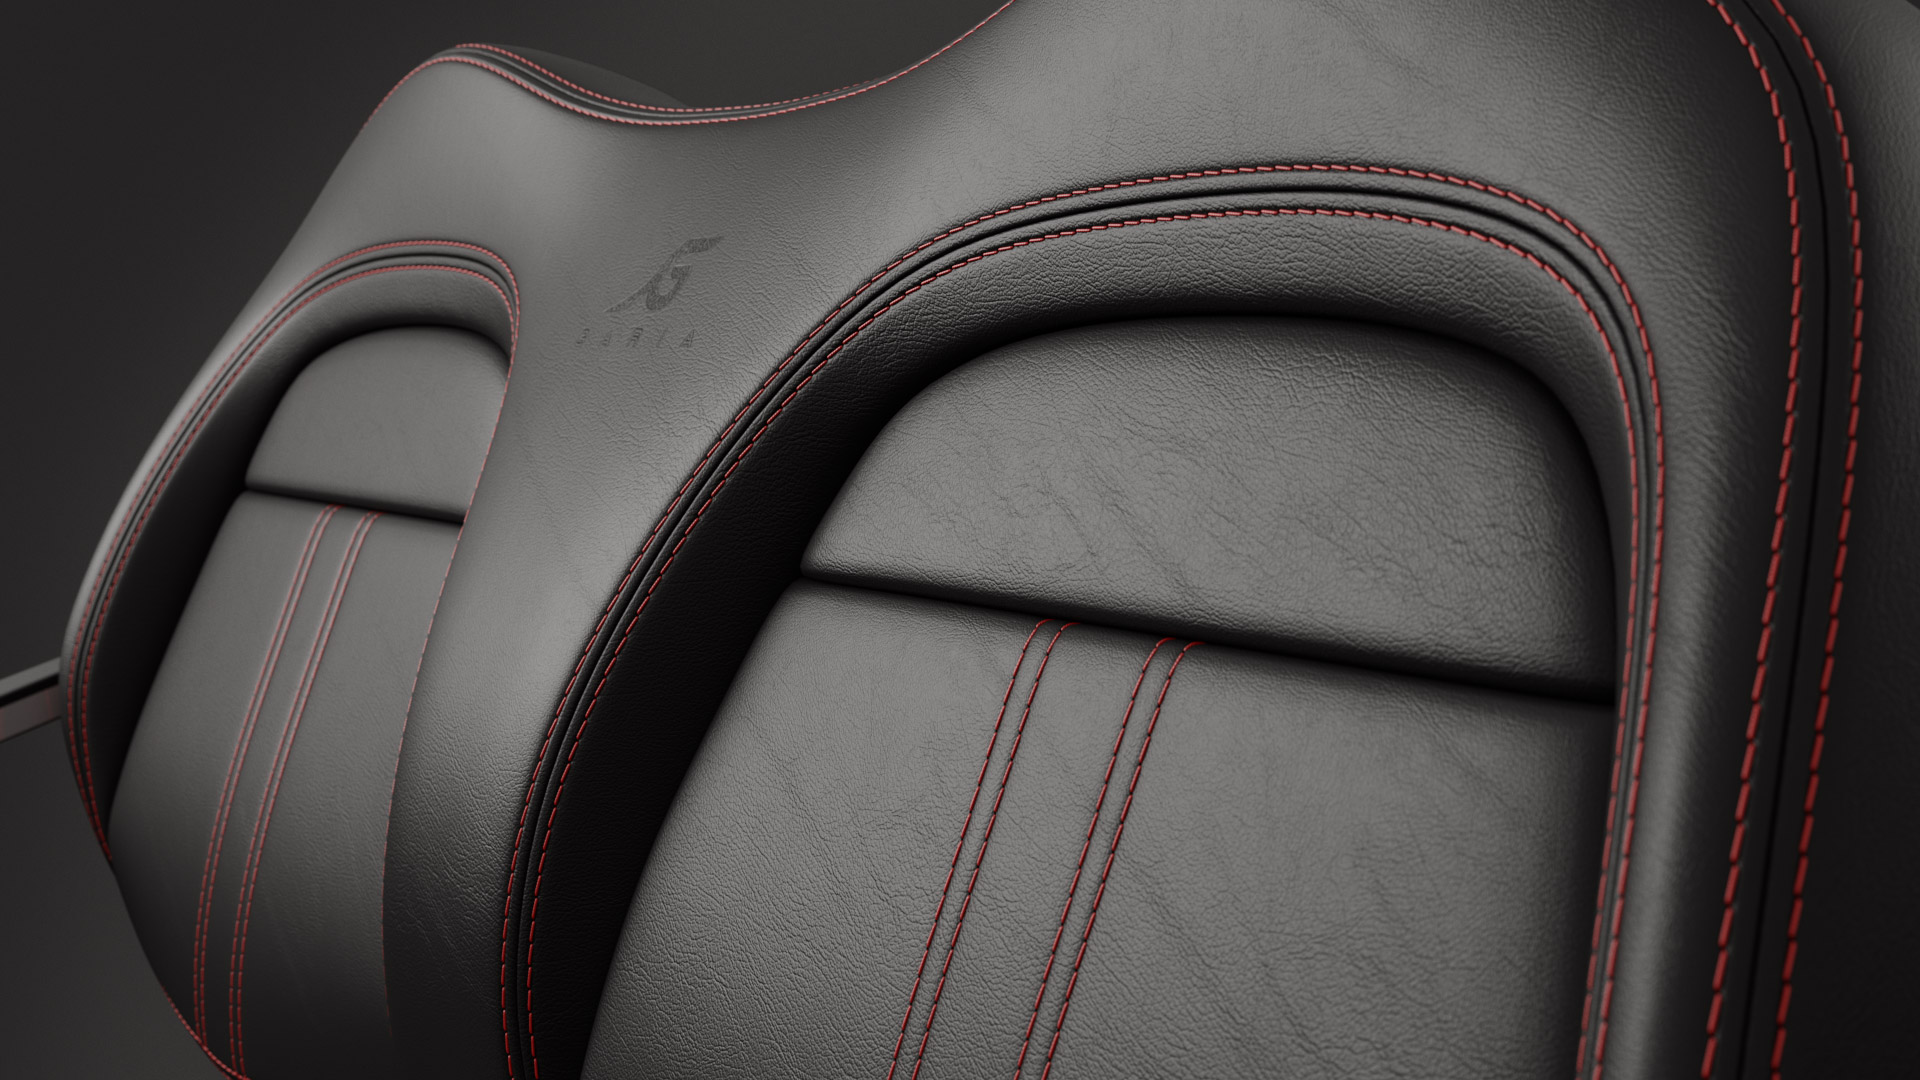
Two types of stitches is currently available, stitches with a round profile and a flat profile. They come in the most used thickness for the given type of stitch. The length of the stitches and the spacing between them can easily be adjusted as well as the rotation, these parameters can also be randomized to create an extra layer of realism.
When stitches are created materials for the stitches and holes is automatically created.
License is perpetual.

StitchGenerator - Help
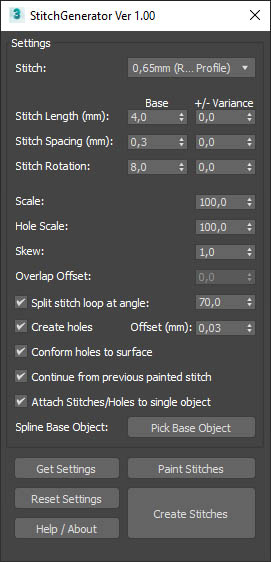
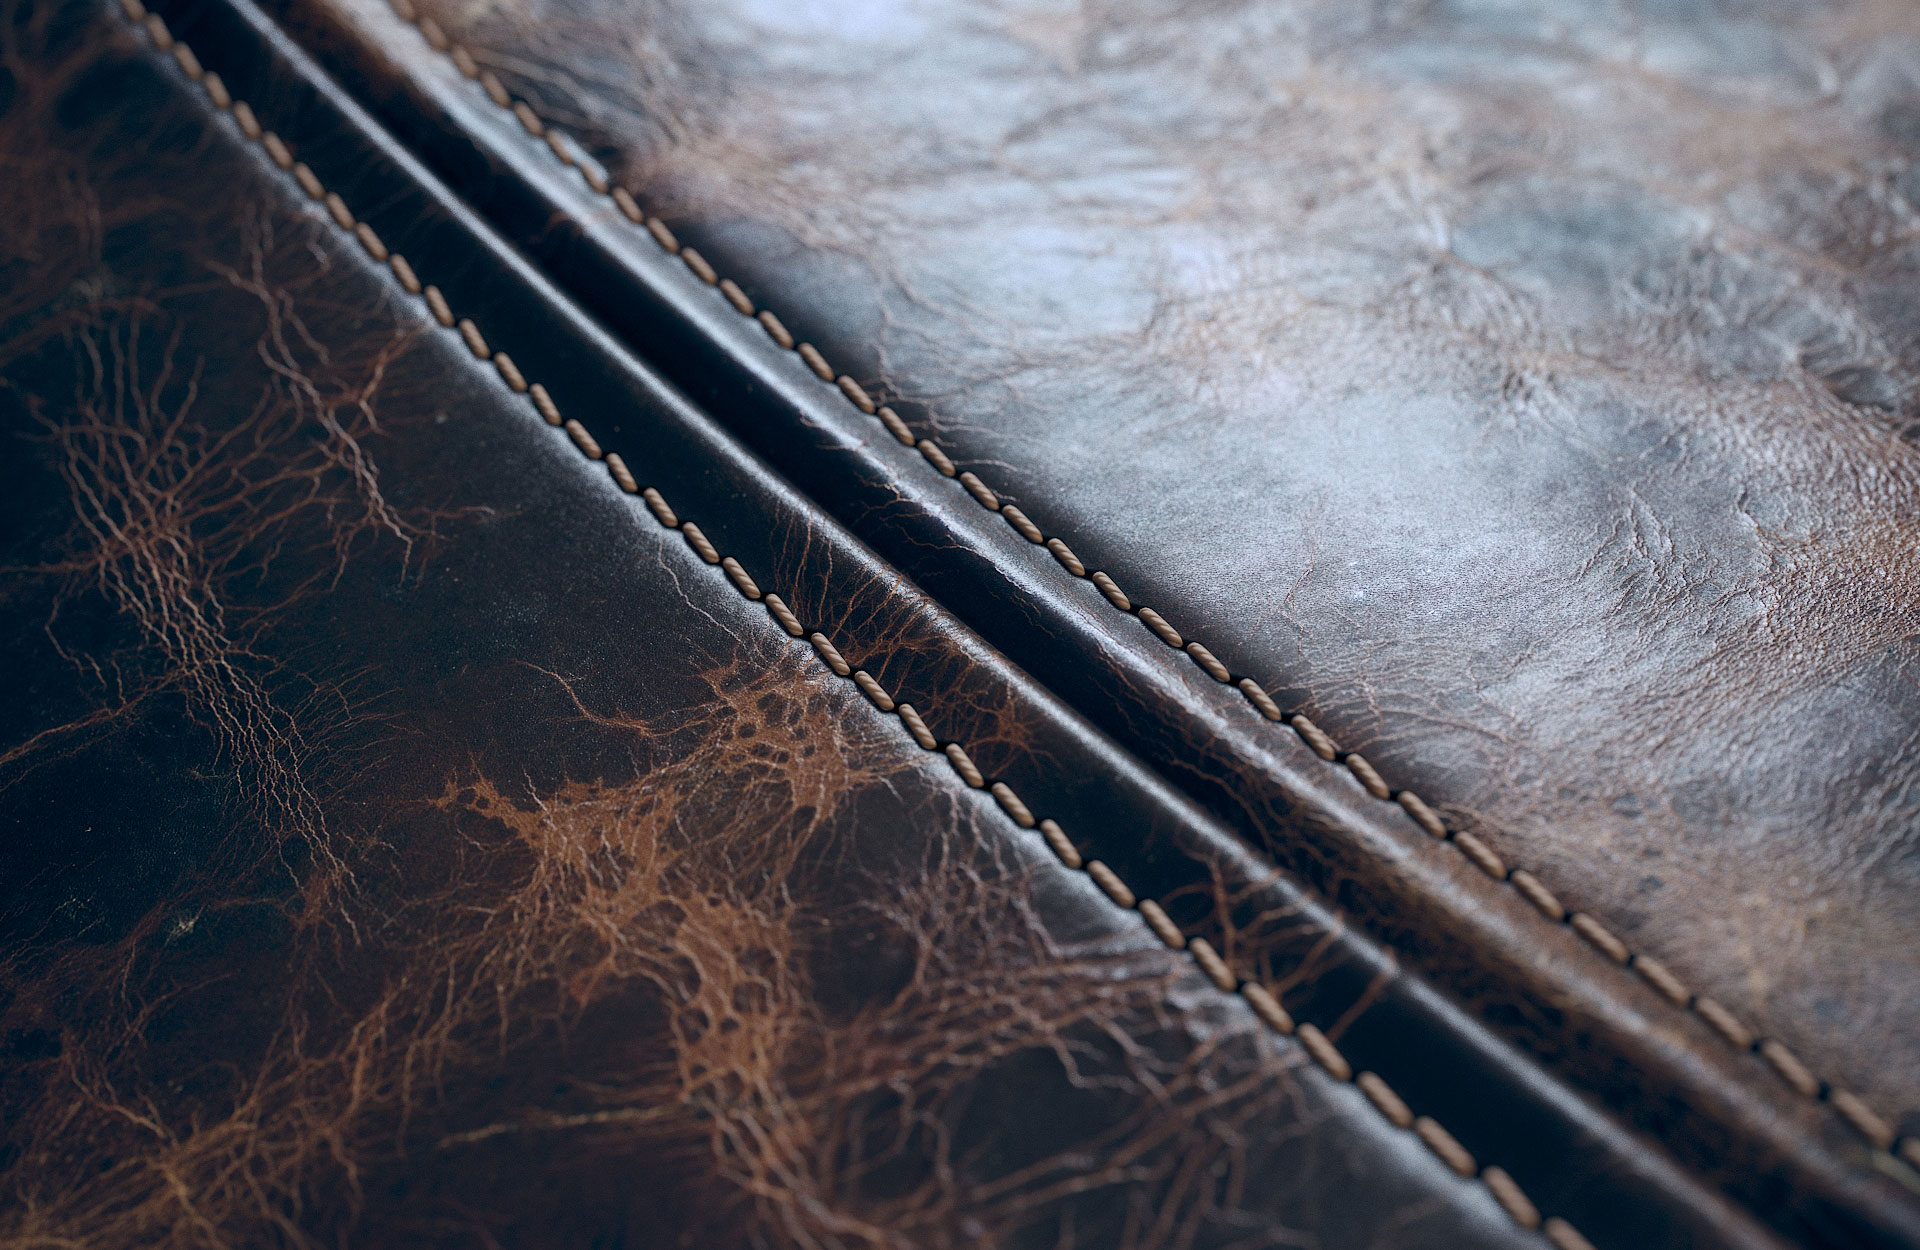
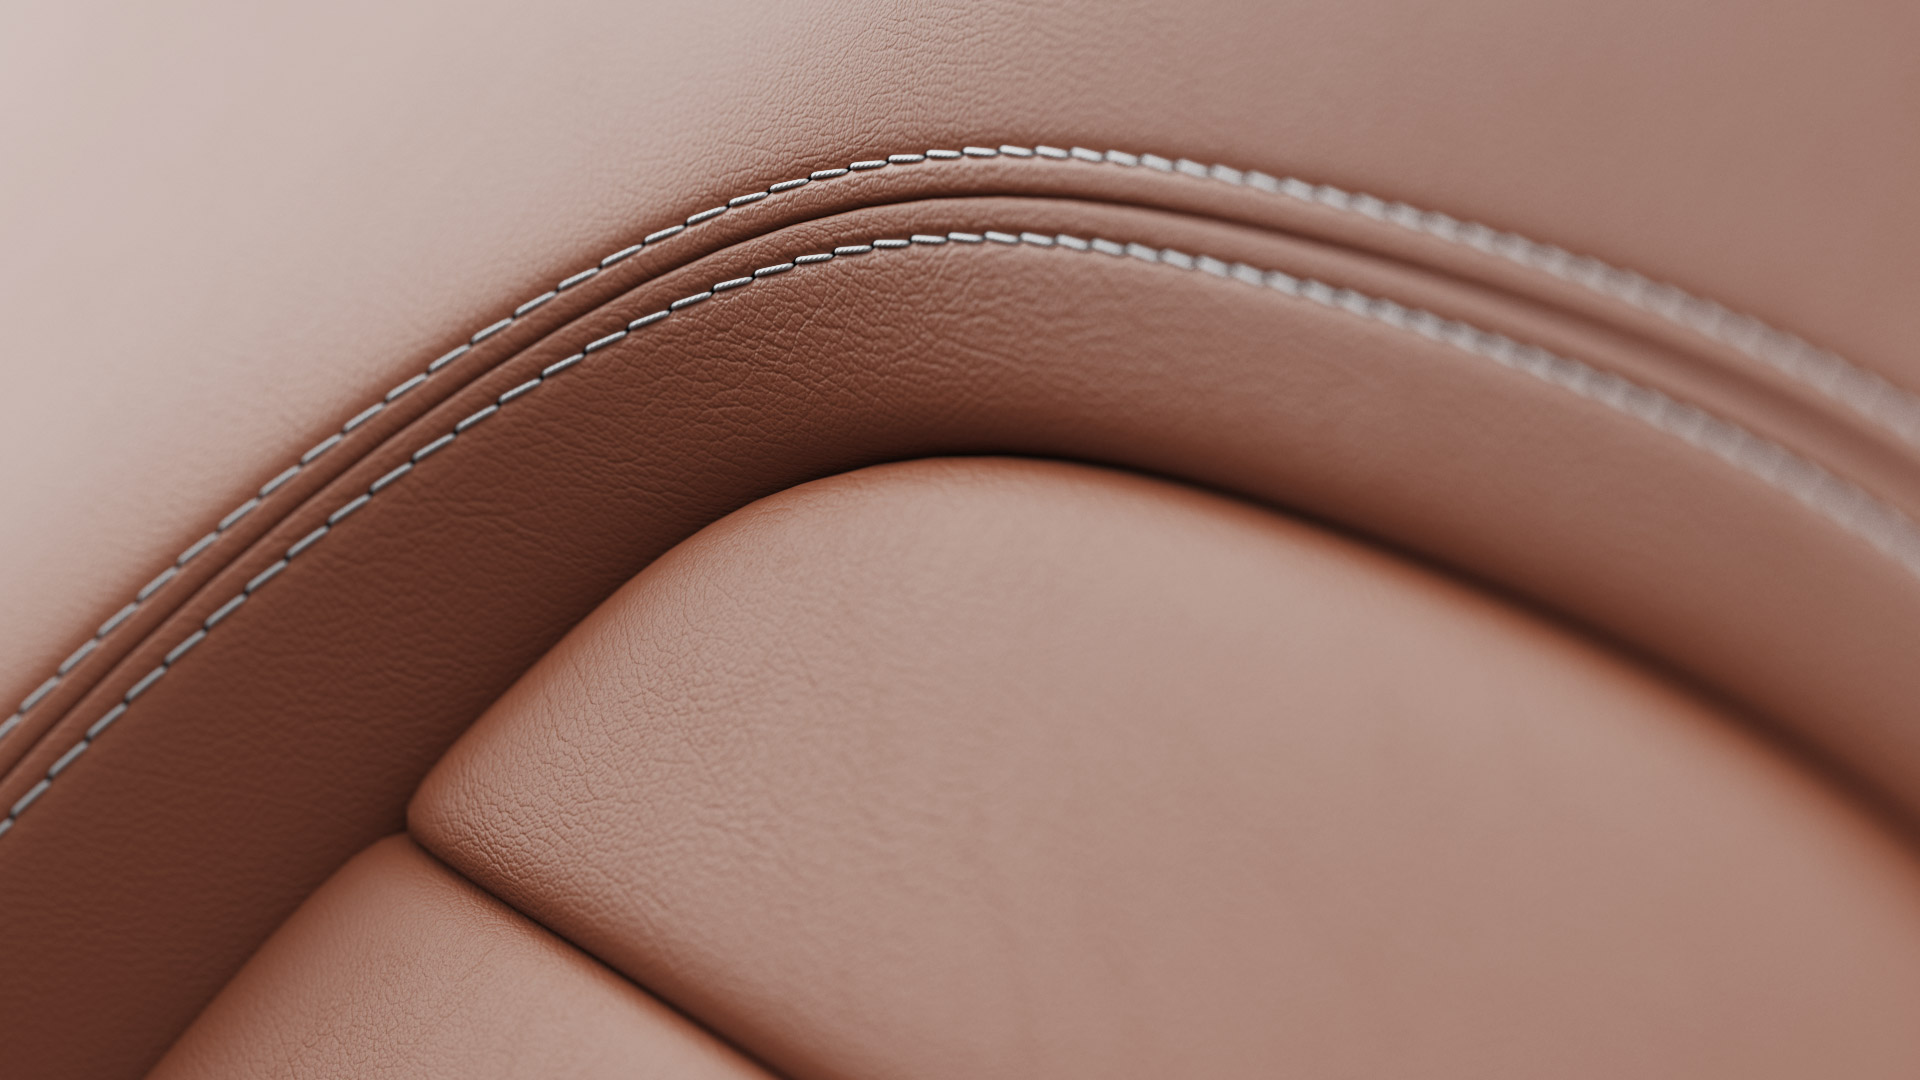
Stitch - There are two types of stitches each with varying thicknesses, the two types are stitches with round profiles and stitches with flat profiles.
Flat profiled stitches are rotated automatically so their ends overlap naturally and they start and end in an elongated hole.

Stitch Length - Length of a single stitch meassured in millimeters. If your scene scale is not in mm it will automatically be converted to the right size.
Stitch Spacing - Distance between stitches, depending on the type of stitch it works different. For stitches with a flat profile the rotation of the stitch will change too if the spacing is increased.

Stitch Rotation - Rotation controls the rotation of each stitch, if a stitch with a flat profile is selected rotation is calculated automatically so their ends overlap naturally and they start and end in an elongated hole.
Scale - Controls the scale of everything, so if you want twice as many stitches at half the size set it to 50.
Hole Scale - controls the scale of the hole obj. between stitches independently

Skew - Skews the stitches, for stitches with a flat profile it makes the stitch looks stretched and more natural.

Overlap Offset - Offsets how much stitches with a flat profile overlaps. Using too high or low values won’t work as the hole object will no longer fit the stitch.

Split stitch loop at angle - Splits the loop of stitches into multiple loops if they turn a sharp corner.

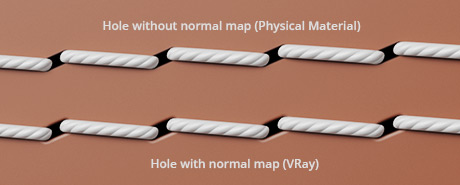
Create Holes - Controls if a hole object should be created between each stitch, and the offset controls the distance between the hole object and the object the stitches is created on.
Conform holes to surface - When on each vertex of the hole object is conformed to the surface below, if off the center is used and the hole object will be flat. If your base object is very flat conforming isn’t needed, and turning it off speeds up the creation.
Continue from previous painted stitch - When painting stitches it will look for stitches nearby and continue from that by creating a hole between it and the new stitches. This makes it possible to paint short strokes and make one long continous loop of stitches.
Attach - Attaches all stitches into a single object, and all holes into another object. If you have a ton of stitches and setting things up you might want to disable this as attaching is fairly slow. If attach is off the stitches are all instances to each other making them easy to modify.
If stitches are made using a spline it is only updateable if attach is on.
Spline Base Object - If stitches are made based on a spline the underlaying object has to be picked, the spline doesn’t have to be exactly on the surface to work, but it should be close.
Get Settings - Pick a stitch from the scene that was previously made and the settings it was created with is loaded.
Reset Settings - Resets all settings to the default values.
Paint Stitches - with an object select you can click paint stitches to easily paint stitches on the object, be careful with painting too fast as the spacing between stitches might get too long. Also if many object in the scene isolate the object you are painting on will speed it up quite a lot.
Create Stitches - stitches can be created using selected edges or splines. When using edges you can use an editable poly model, or a model with a edit poly or poly select modifier. When using a spline you have to pick a base object that stitches can be projected onto. when using the spline method you can later easily update the stitches to make adjustments.
Materials
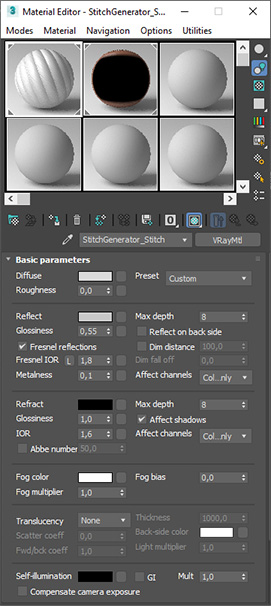
When StitchGenerator is started a material for the stitches and hole objects is created, if there already are materials with the name in the scene they will not be created, it will instead what there is. If your assigned render is VRay then VRay matearials is created, if your render is not VRay then standard Physical Materials is created.
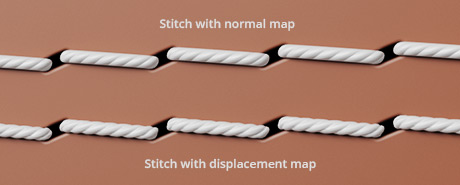
Stitch Material - The material for stitches is a simple material, it is just a color with reflections and a normal map to make it look it's made of twisted threads. The textures used are stored in the userscripts folder under StitchGenerator, the userscripts folder can be found by typing > getdir #userscripts < in the MAXSscript listener (F11)
If you want to take it a step further and make some closeups then there is also a displacement map for the stitches in that folder, you have to apply it to the stitches manually as it depends on which render engine you are using, and the size of the stitches.
Hole Material - The material for the hole object for VRay is a little more complicated than the stich material, if not using VRay it is very simple, just black with an opacity map to make the edges a bit blurred and make the hole perfectly round without using too many polygons for the hole object.
For VRay the material also uses reflections and a normal map, this is to catch a highlight on the sides of the hole illustrating that the hole goes into the object below it. To make this an area outside the black part of the hole has to be visible, it is brown by default and should be changed to the same color of the object you are puttin the stitches on.